
3D PVC Mascot Dispensing Process: Preventing Color Flow with Layering and Heat Pressing
3D PVC mascots are built through layered dispensing, first-layer curing, backing and clear materials, secondary heat pressing, cooling, and demolding. This guide organizes the key checkpoints to control color boundaries, transparency, thickness, and consistency before mass production.
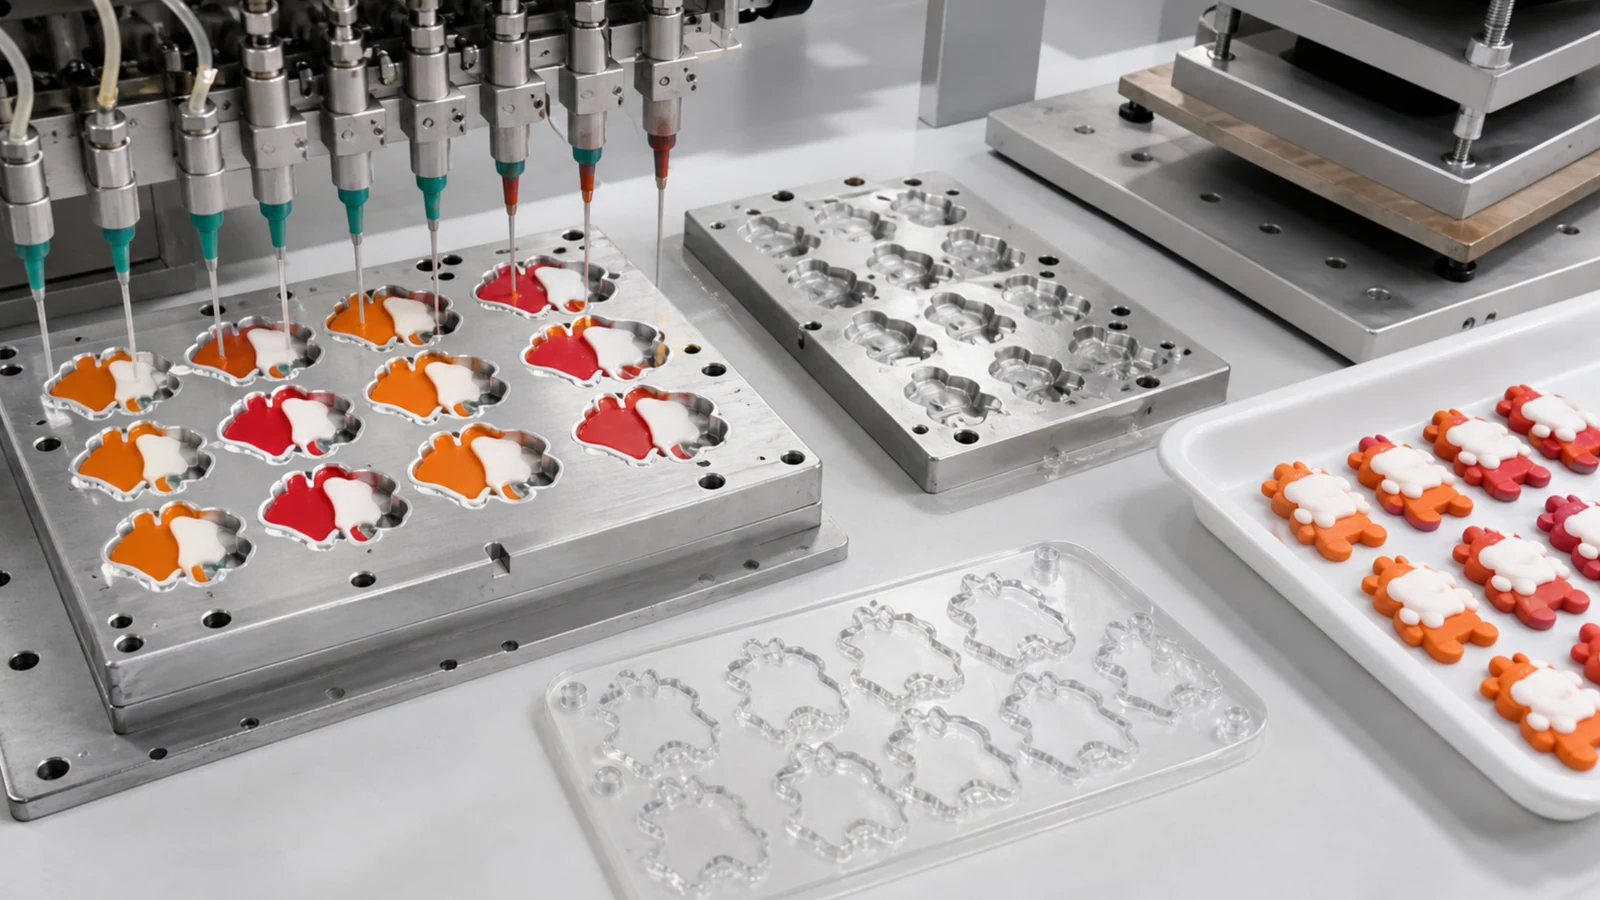
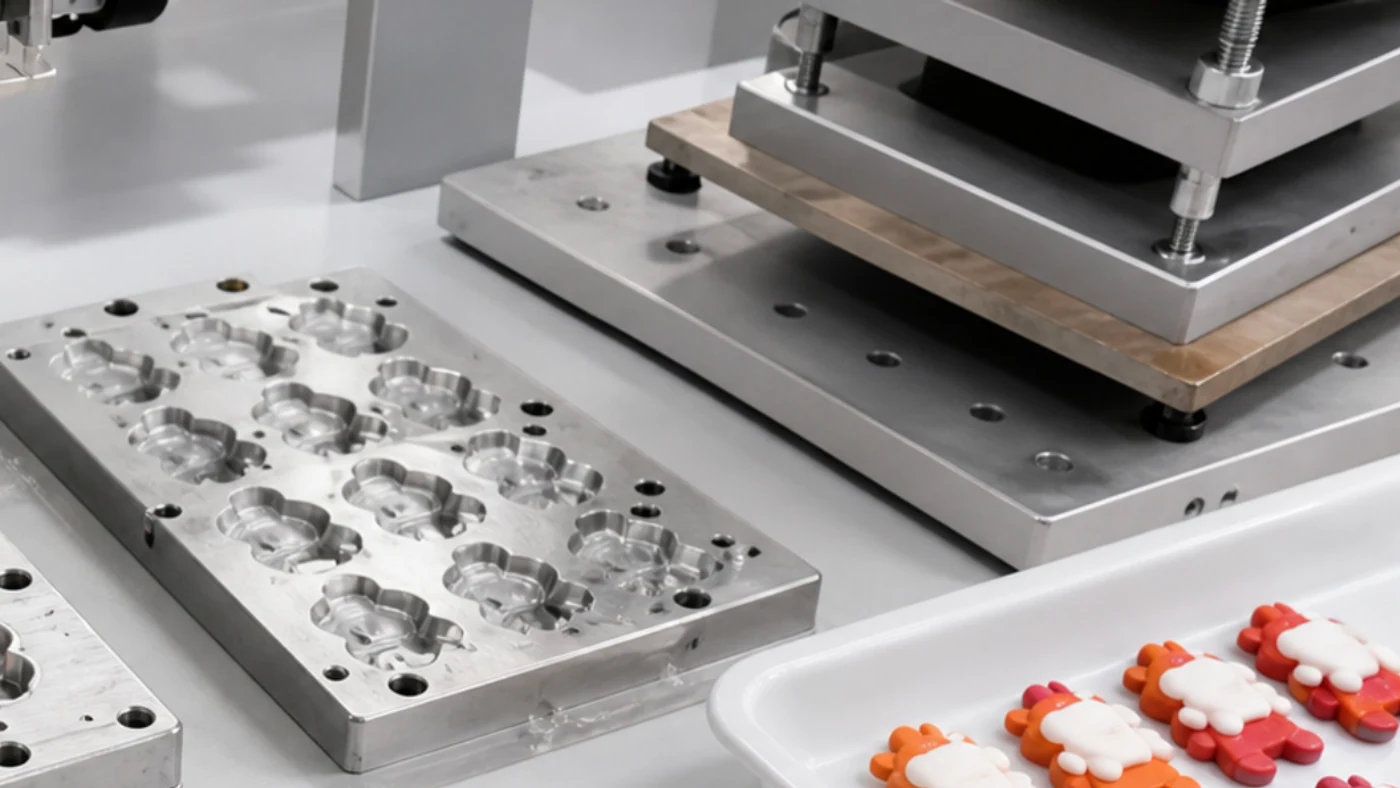
Basic Process for 3D PVC Mascots
In 3D PVC mascot production, a multi-nozzle dispensing machine fills colored material into the mold. The first layer is cured before the second layer is added, then backing material and clear material are applied before secondary heat pressing. This process is not only about appearance; it also helps control color bleeding, bubbles, and deformation in mass production.
Confirm Color Order in the Design Data
For 3D PVC, the same artwork can produce different results depending on color order. Confirm the sequence for outlines, facial details, clothing, accessories, background color, backing material, and clear layers in the specification sheet and sample.
- Clarify color count, color boundaries, and fine-line limits
- Define the clear-layer area and preferred thickness
- Confirm mold split lines, demolding direction, and front/back thickness
- Prioritize commercial details such as face, eyes, and mouth
Deciding which details matter most at the quotation stage makes sample revisions much more precise.
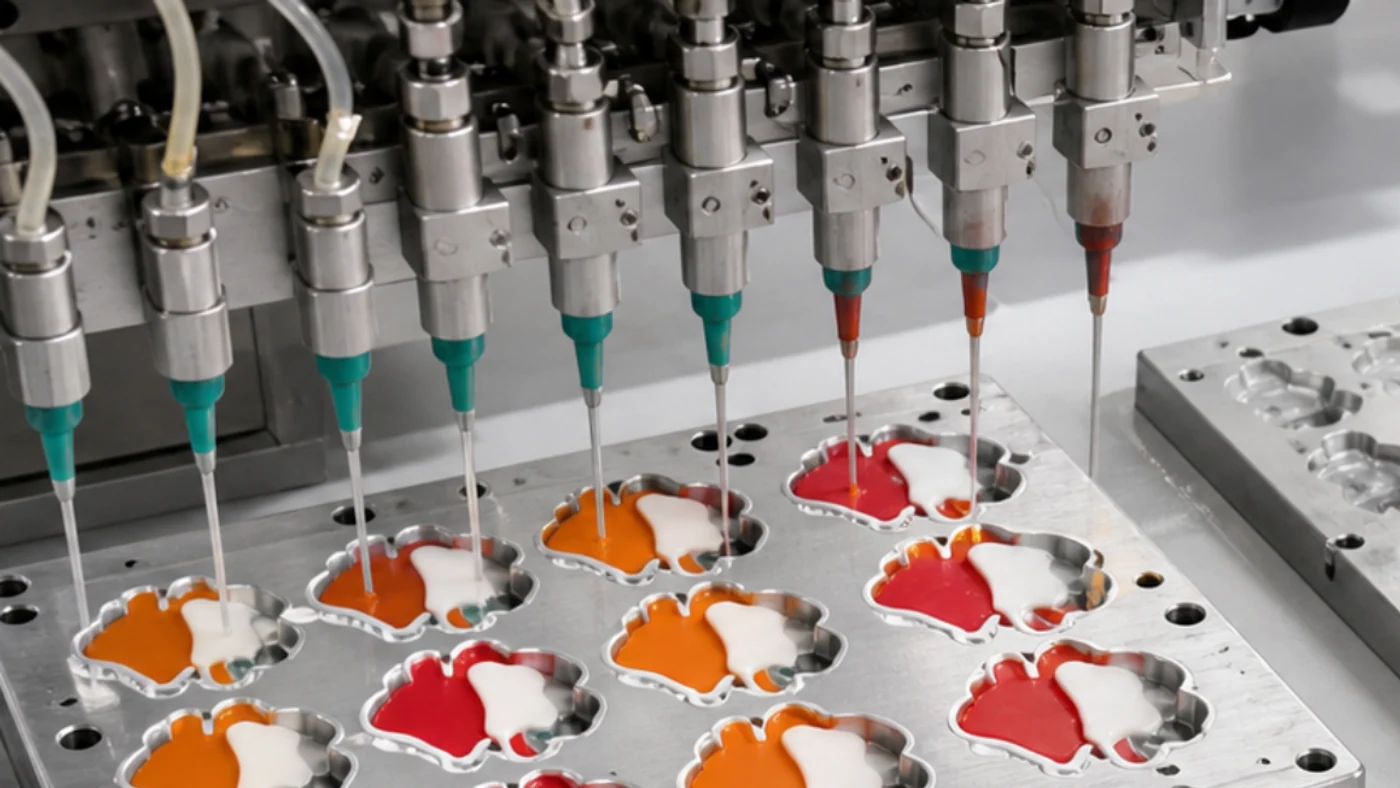
Review Dispensing Material by Flow and Curing Conditions
When fast-curing dispensing material is used, stabilizing the first layer before moving to the next layer makes fine color boundaries easier to control. If the material is too soft, it can flow into neighboring colors; if it is too hard, it may not fill details well. Condition control matters as much as the material name.
- Check viscosity, hardness, curing method, and curing time
- Check compatibility with color material and clear layers
- For export projects, confirm phthalate, RoHS, REACH, EN71, or other required standards
- Recheck conditions if the material lot changes between sample and mass production
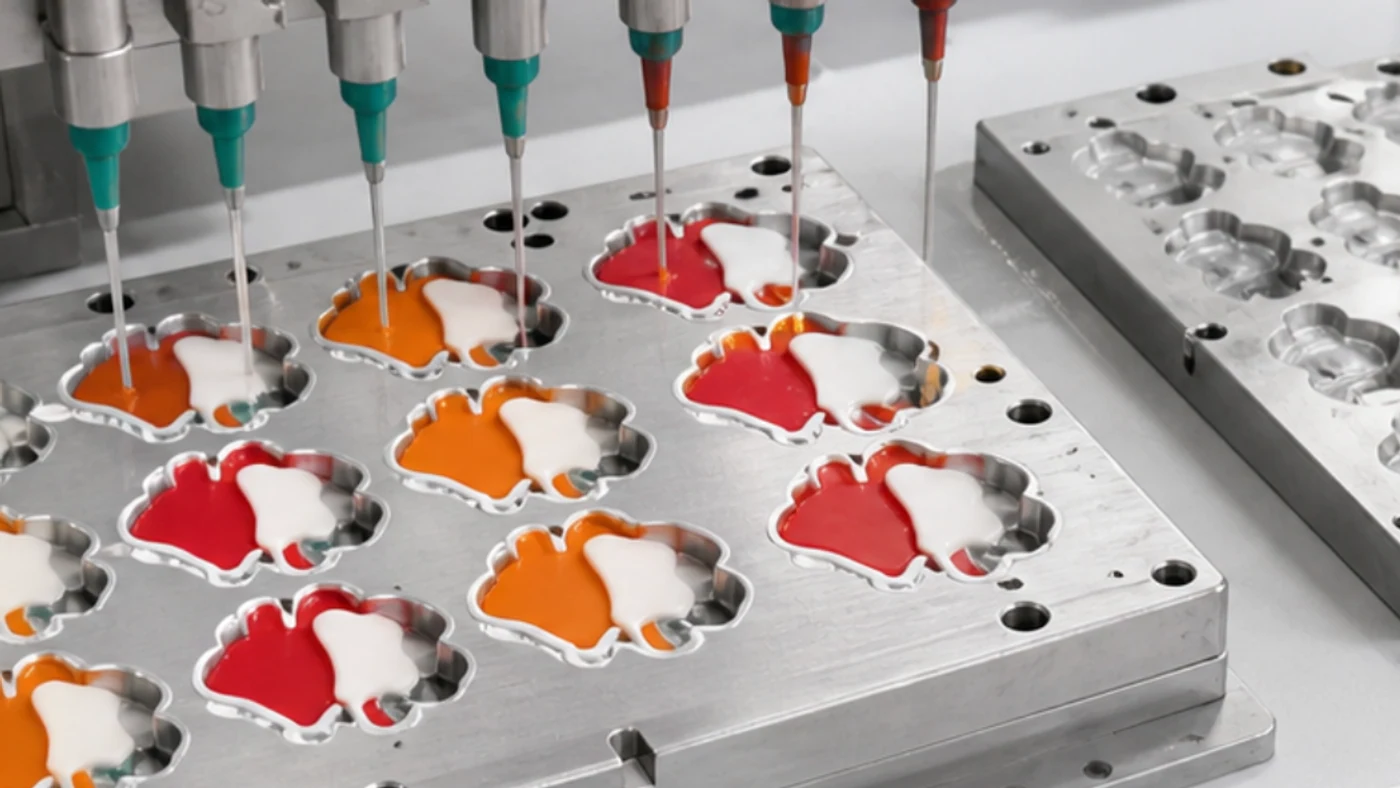
Prevent Color Flow with First-Layer Dispensing and Temporary Curing
For detailed 3D parts, it is more stable to fill the first layer, temporarily cure it, and then add the second layer than to build too much thickness at once. Curing the first layer before the second layer is the basic control method for preventing color flow.
- Whether the first-layer color boundary remains clean
- Whether the second layer pushes the previous color out of place
- Whether bubbles appear in thicker areas
- Whether multiple samples remain consistent under the same conditions
One sample is not enough for judging consistency, so compare several pieces side by side for color boundaries and thickness.
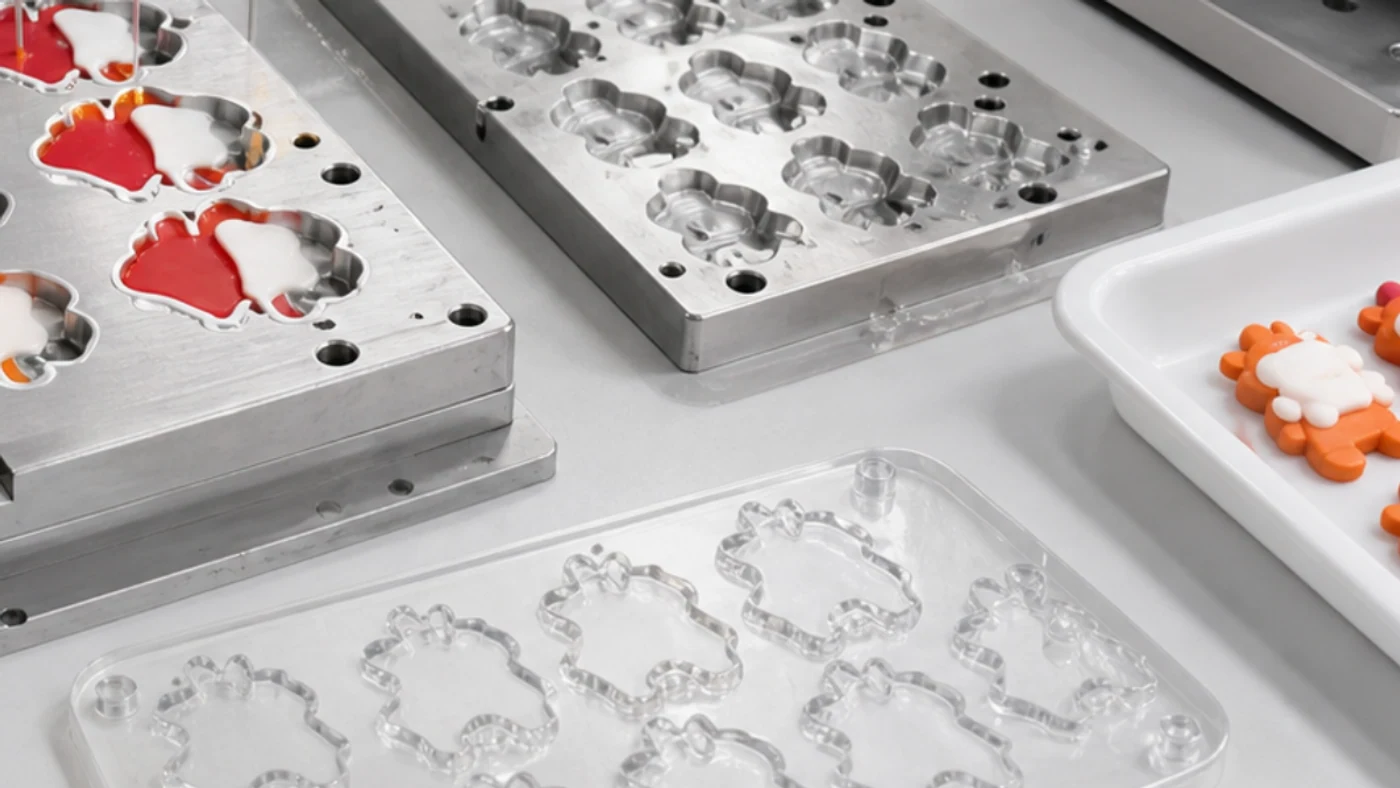
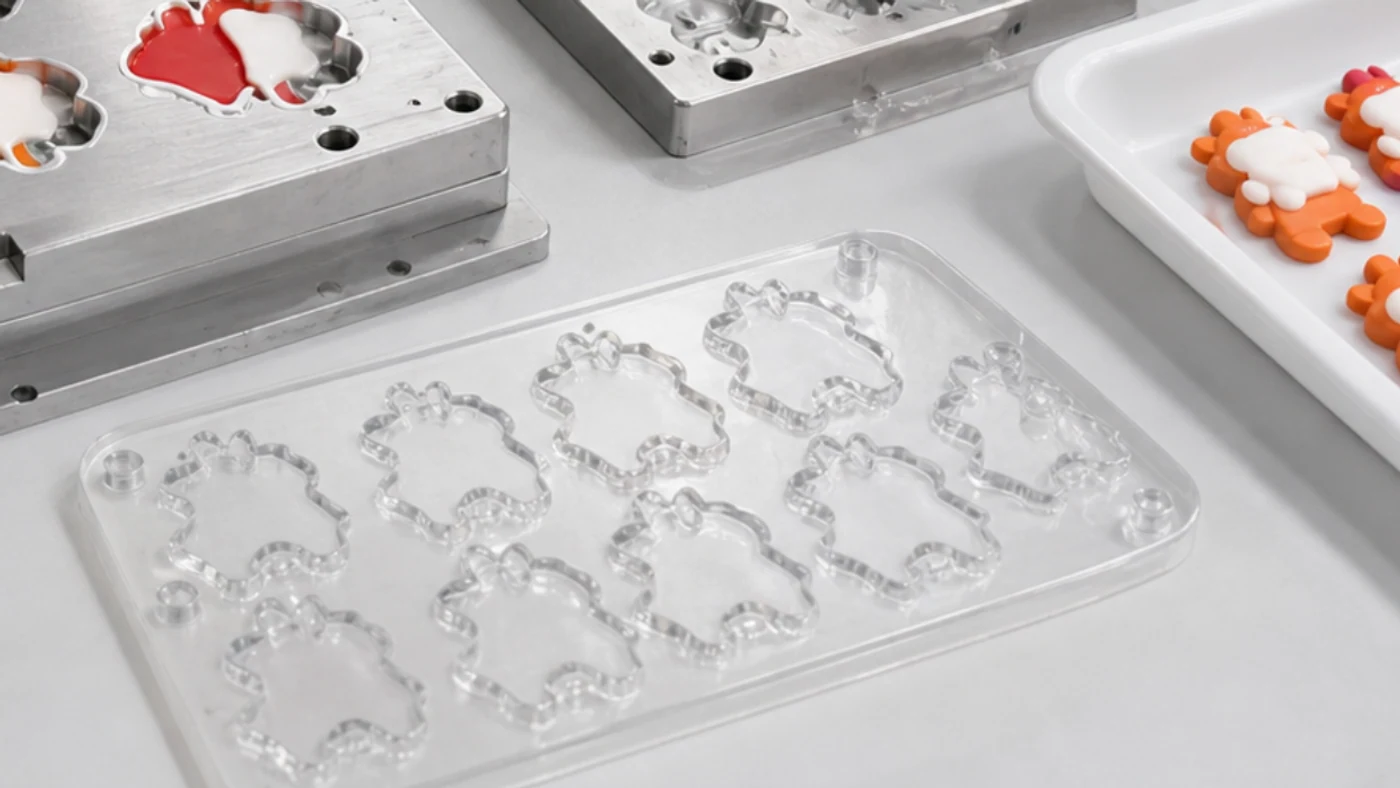
Manage Backing Material and Clear Material for Different Purposes
Backing material affects product thickness, back-side stability, and shape retention. Clear material affects surface gloss, depth, and protection. Both are added materials, but they need different control standards.
What to Check for Backing Material
Thickness, hardness, back-side flatness, part strength, and hardware interference.
What to Check for Clear Material
Transparency, yellowing, bubbles, surface waviness, and color impact.
If the clear layer is too thick, the design can look blurred, so balance appearance and strength during sample approval.
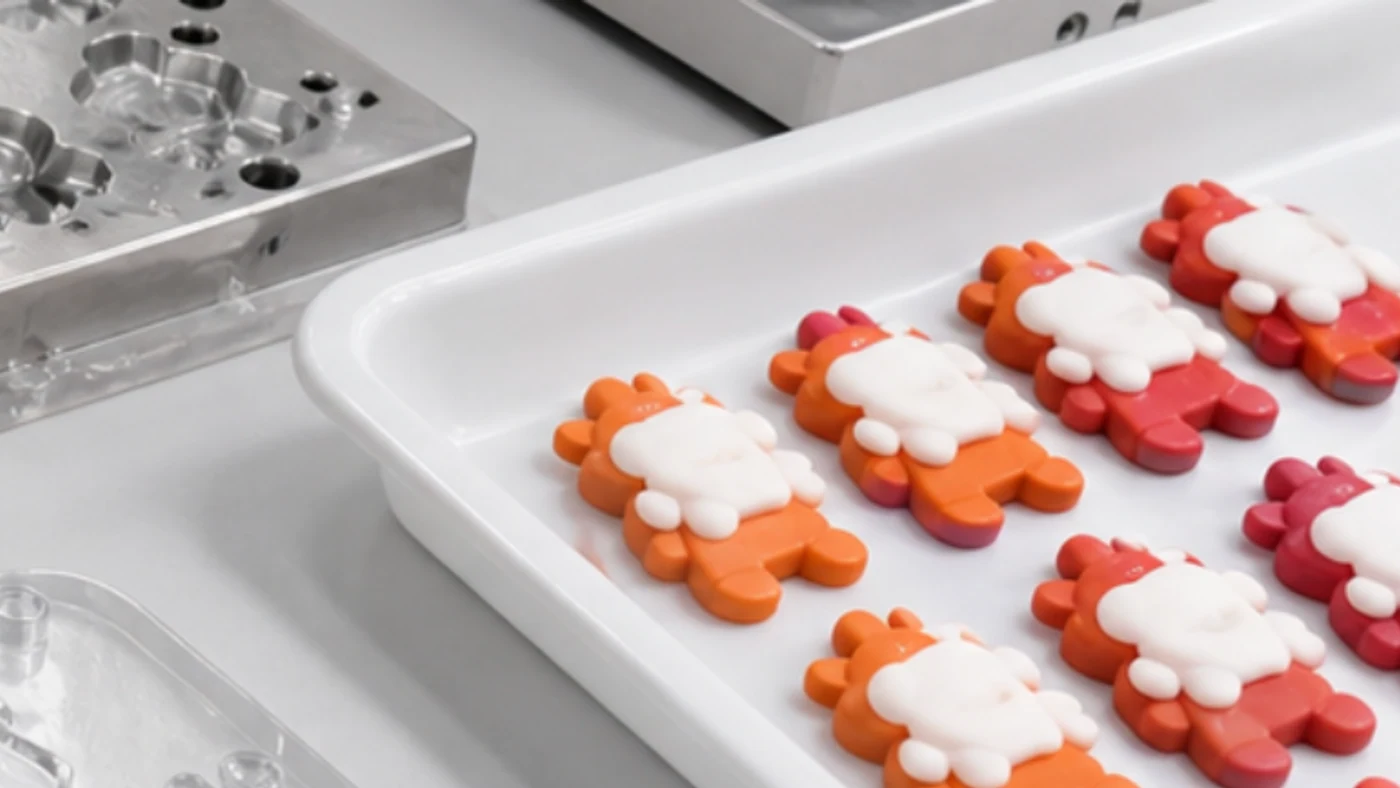
After Cooling and Demolding, Check More Than the Front View
Open the mold and remove the product only after cooling and shape stabilization. Even if the part looks fine immediately after demolding, warping, whitening, or clear-layer lifting may appear later.
- Check front, sides, back, and thickness
- Inspect edge flash, bubbles, color boundaries, and clear-layer adhesion
- Check rubbing and color transfer after individual packing
- Compare approval samples and first mass-production pieces under the same light
Materials to Prepare before Quotation
Before requesting a quotation for a 3D PVC mascot, preparing the following information helps the factory review the project quickly. Even if the documents are not complete, a reference image, preferred size, and quantity are enough for an initial estimate.
- Front artwork, and side view if available
- Finished size, thickness, and softness preference
- Color count, clear-layer requirement, and gloss preference
- Quantity, SKU count, color variants, and packaging requirements
- Export safety standards and inspection requirements
Pre-Production Checklist
Turn the production flow into buyer-friendly pre-production checkpoints.
| Check Item | What to Check | Risk Example |
|---|---|---|
| Design Breakdown | Color order, clear-layer range, and backing-material area | Fine lines collapse or color boundaries become unclear |
| Material Conditions | Viscosity, hardness, curing method, and compliance standards | Too runny, or too hard to fill fine details |
| First-Layer Curing | Cure the first layer before the next process | The second layer pushes the previous color out |
| Clear Material | Transparency, bubbles, yellowing, and surface unevenness | Design looks blurred or bubbles remain |
| Heat-Pressing Conditions | Temperature, time, pressure, and cooling time | Warping, deformation, or clear-layer lifting |
| Demolding Inspection | Sides, back, edges, and thickness | Front view is acceptable but side quality is rough |
| Post-Packing Check | Rubbing, color transfer, and backing-card interference | Surface becomes scratched after individual packing |
Start with Sample Review for Your 3D PVC Mascot
Share your artwork, size, thickness, color count, clear-layer preference, quantity, and packaging requirements, and we will organize the layered dispensing and secondary heat-pressing checkpoints before quotation.